Lenovo Ideapad 330S RAM Upgrade
October 2020Lenovo Ideapad 330S, the laptop we all know is ideally suited for budget laptop buyers wanting the best bang for their buck. The Laptop comes with astounding specs for the price point and comes with 4GB of RAM. 4 GB of RAM!, wait this looks a bit odd. Yes, this is because since this is a budget Laptop, Lenovo wanted to save costs and has left the decision for the customers to decide whether to upgrade the RAM or not.
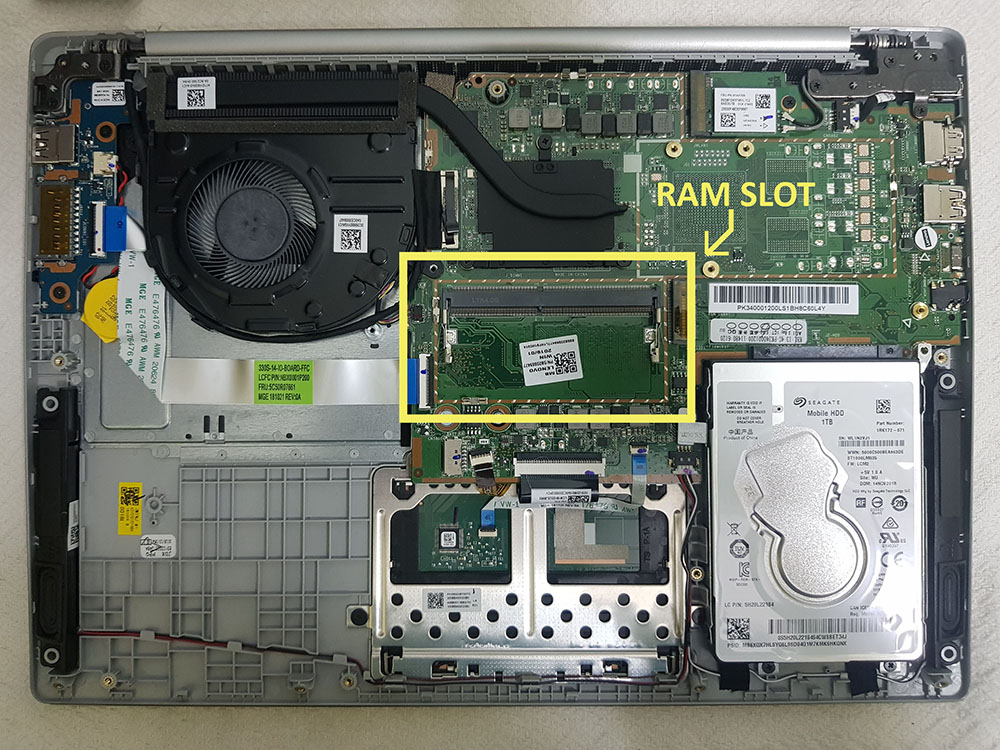
The Lenovo 330S has 4GB RAM soldered onto the laptop motherboard and the has one spare RAM slot for upgrade. We can either add a 4GB or 8GB RAM onto this slot upgrading the total capacity to 12GB. So without much thinking and talking, let us straight dive into the topic and get the laptop upgraded.
Do I need to upgrade the RAM of Lenovo Ideapad 330S?
Step 1 - Check the Type and Amount of existing RAM
First and foremost you have to check what is the amount of existing RAM present and also crosscheck the RAM Type used by your Laptop. Download the hardware maintenance manual for Lenovo 330S Laptops here. The hardware maintenance manual is a very important document and it is better that you take a printout of it as it may come handy in the future or during this upgrade operation.

Referring Fig 1.1 above, which is from page 30 of the manual, the RAM specification is given which tells us the below
1. RAM frequency : 2400 MHZ
2. RAM Type : DDR4
3. Maximum RAM per slot : 8GB
It is also always better to cross check your system for the current condition in case there was RAM installed or not. To do this head over to Task Manager by pressing CTRL+ALT+DELETE, once in the task manager click on the Performance tab besides Processes. In Performance click on Memory below the CPU section. Here you will have to note down 2 things as shown in the red boxes
1. Slots Used : This has to be 1 of 2, if it is 2 of 2 it means all the slots are utilized.
2. RAM Speed : Please note down this speed if it is not the same i.e.2400 MHZ mentioned in the Manual.
3. RAM Size : This should be 4GB normally. In case it is more, you have to check the number of slots used. If only one slot is used, you can upgrade the RAM.
4. RAM Type : As there is no mention of RAM Type, it is assumed it is DDR4, if there is mention of DDR3 then the RAM is DDR3.
Step 2 - Buying the RAM
1. Amount of RAM : Since the already present RAM is 4GB, you have two options by either adding 4GB of RAM or 8GB of RAM to make it 8GB or 12GB respectively. The max you can add is 8GB of RAM as it is mentioned in the manual.
2. Speed of RAM: Ideally go for the speed that is mentioned in the manual i.e. 2400MHZ. In case, you found the speed to be different in the windows task manager, please opt for that speed.
3. RAM Type: This should be DDR4 as standard. In case it is DDR3, then you have to strictly buy DDR3 RAM.
You can buy any of the below recommended RAM for this Laptop (Amazon.in affiliate links are provided), we have used HyperX RAM from Kingston which based on superior performance. We recommend that you install 8GB of RAM as we have only one slot and hence installing the maximum capacity that the slot can take will enable the full potential of this laptop.
8 GB RAM:
1. Kingston HyperX Impact 8GB DDR4 2400MHZ RAM-HX424S14IB2/8 \
Buy from Amazon.in2. Corsair Vengeance 8GB DDR4 2666MHz RAM-CMSX8GX4M1A2666C18
Buy from Amazon.in3. Crucial 8GB DDR4 2666 MHz CT8G4SFRA266
Buy from Amazon.in4 GB RAM:
1. ADATA 4GB DDRA4 2666 - AD4S2666J4G19-R
Buy from Amazon.inStep 3 - Setting up for the Upgrade
1. RAM : Carefully handle the RAM and make sure it is kept in the plastic case and should be only taken out during the upgrade to avoid any damage.


4. Anti-Static Strap(Optional) : An anti-static cable will ensure no static charge from our body damages any laptop circuit.
5. Pry Stick (Optional) : Pry Sticks can be useful especially when dealing with small laptop components like cable connectors and stuff which is difficult to be handled with fingers. Pry Sticks will also ensure that our body contact with the laptop electronics is minimized which is desirable.
6. Plastic Container (Optional): A container will ensure that the screws are in place which are more likely to be misplaced during operations like this. If you have all the tools in place, they will help you to ease the process and ensure that there is no damage caused to your laptop due to exertion.
Step 4 - Upgrading the RAM


1. Since this involves opening up your laptop "PLEASE UNPLUG YOUR CHARGER AND SWITCH OFF YOUR LAPTOP" before opening your laptop.
2. Please keep all the screws in one place and keep note of which screw goes where. There are 3 sets of screws and you have to note it.
3. During the course of this operation, you find some obstruction as to the cover not opening or cable not coming out, "PLEASE DO NOT FORCE" and remember "PATIENCE IS THE KEY". Hence, we highly recommend using the optional tools mentioned in the tools list as they will ensure minimum effort and best results.
1. First step is to switch off your laptop and wait for at least 2 minutes so that any hard disk movements will not be present.
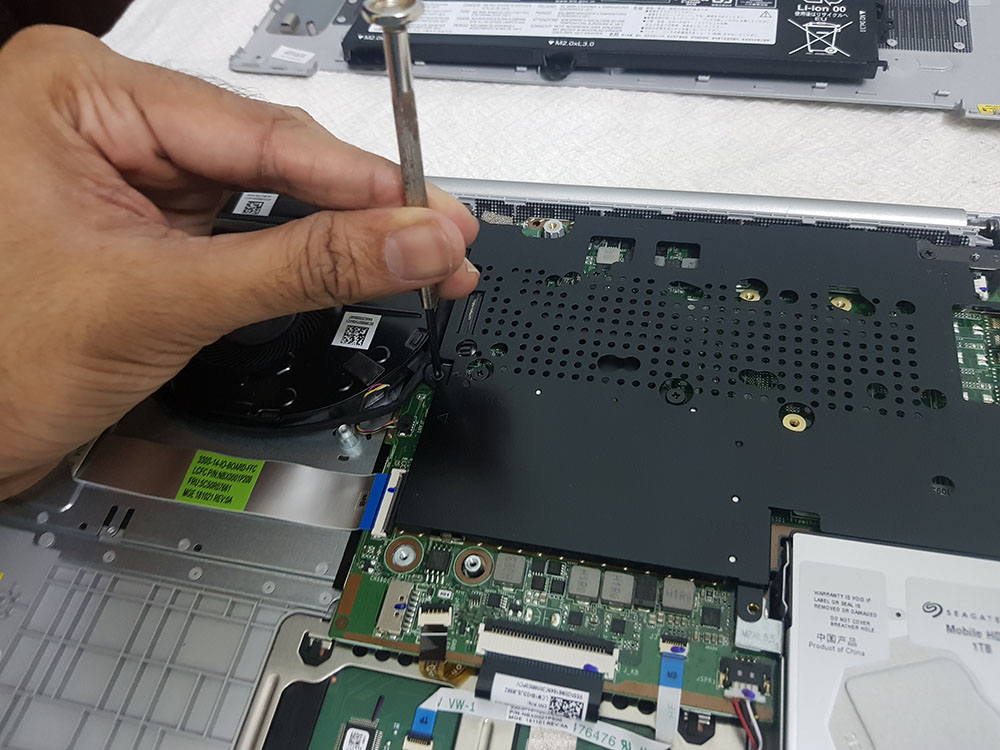
2. Turn your laptop upside down as shown, Fig 4.2 shows the back cover with the location of screws. Unscrew all the screws holding the back cover as shown in Fig 4.2a. Apply the suction cup on the back cover as shown in Fig 4.2b, refer Fig 4.2 for location and with the help of the pry stick slowly remove the back cover as shown in Fig 4.2c. This step has to be done with patience and the pry stick has to be used to slowly open by going through the middle and the corners shown in Fig 4.2.


